Information, not legal advice: Bali Visa Application is an independent guide and concierge — not the government, Imigrasi, or a law firm. Visa rules, eligibility and fees change and apply case-by-case; all prices are USD ranges flagged with a last-verified date and exclude case-specific costs. Always confirm current rules on the official portal evisa.imigrasi.go.id and with a licensed agent before acting. We never guarantee visa approval. If you proceed with an agent we introduce, they may pay us a referral fee at no extra cost to you.
To understand how to apply e visa Indonesia, you need to follow Indonesia’s official online system on evisa.imigrasi.go.id from account registration through payment and downloading your e-Visa. This guide walks you step by step through both the e-VoA (electronic Visa on Arrival) and the single-entry visit e‑Visa so you know exactly what to click, upload, and expect at the airport.
What is Indonesia’s e-Visa system?
Indonesia’s e-Visa system is an online portal run by the Directorate General of Immigration where you can:
- Apply e VoA Indonesia (electronic Visa on Arrival) for short tourism and limited business trips.
- Apply for a visit e‑Visa (single entry) for longer stays or for purposes that don’t fit the VoA rules.
The official website is evisa.imigrasi.go.id. All official applications start there, even if an agent or your hotel assists you.
This page focuses on:
- Tourist e-VoA (B1 / B1A) – short-term tourism, social visits, limited business.
- Single-entry Visit e‑Visa (B1 / B1A variants) – tourism and social visits with longer validity and more flexibility.
Policy details change regularly. The steps below reflect the rules and platform behavior tracked and verified up to June 2026.
Who can (and should) use the Indonesia e-Visa system?
Visa categories covered in this guide
This e visa guide focuses on two practical routes most Bali and Indonesia visitors use:
- e-VoA (Electronic Visa on Arrival)
- Short stays for tourism and simple business activities. Applied online before travel or paid on arrival at participating airports/seaports.
- Single-entry Visit e‑Visa
- Pre-approved e-Visa issued before you fly, often used for people staying longer or preferring to clear immigration faster with everything pre-arranged.
Other categories exist (work KITAS, investor, second home, etc.), but they use different documents and often require a local sponsor. Those are outside the scope of this specific “how to apply” walkthrough.
Who is eligible for e-VoA and visit e‑Visa?
Eligibility is based on:
- Your nationality – only certain passport holders can use e‑VoA or visa on arrival.
- Your purpose of visit – tourism, family visit, some business activities are usually allowed.
- Your return/onward ticket – immigration expects proof you’ll leave within the permitted stay.
Immigration publishes the eligible nationality lists and permitted activities. These change from time to time, especially after regulatory updates. Before starting any online visa application Indonesia, double‑check the current list on the official Immigration site or with a specialist.
Who should consider applying online instead of on arrival?
Using the online portal is especially helpful if you:
- Prefer to skip payment queues after a long flight.
- Have a tight connection in Jakarta, Bali, or another airport.
- Want to avoid dealing with airport cash/credit card machines.
- Like to have your visa approved in advance to reduce uncertainty.
If you have an unusual passport history, previous overstays, or a complicated travel pattern, a pre-arranged visit e‑Visa may also be safer than relying on airport discretion.
Step 1 – Create your evisa.imigrasi.go.id account
1.1 Go to the official portal (and avoid lookalikes)
Always type the URL directly: https://evisa.imigrasi.go.id. There are many “visa helper” sites with similar names that charge extra fees and then submit on your behalf. Some are legitimate agents; some are not. The official system:
- Will be under the .go.id government domain.
- Uses “Directorate General of Immigration” or “Ditjen Imigrasi” branding.
- Shows prices in IDR (Indonesian Rupiah) as base amounts, even if a card processor converts to another currency.
1.2 Register a personal account
Select “Register” or similar, then:
- Choose “Foreigner” as the user type.
- Enter your full name exactly as in your passport.
- Use a primary email address you can access easily on your phone.
- Create a strong password and store it in a password manager or notes app.
Immigration will send a confirmation link to your email. Click it to activate the account. Check spam/junk if it doesn’t arrive within a few minutes.
1.3 Fill in your profile details
Once logged in, you’ll usually be asked for profile information:
- Passport number, nationality, issue & expiry dates.
- Date and place of birth.
- Home address and phone number.
Accuracy matters. Inconsistent data between your account, application form, and passport can delay or derail your application.
Step 2 – Choose e-VoA vs Visit e‑Visa
Before you press “New Application,” decide which visa type suits your trip. Here is a simplified comparison based on current practice up to June 2026.
| Feature | e-VoA (Electronic Visa on Arrival) | Single-entry Visit e‑Visa |
|---|---|---|
| Typical purpose | Tourism, family visit, limited business | Tourism, family visit, some business/social stays with more pre-planning |
| Where you apply | Online via evisa.imigrasi.go.id OR at selected airports/ports | Online only via evisa.imigrasi.go.id |
| Who applies | You (self-apply) | You or an authorized sponsor/agent, depending on sub-type and rules |
| Processing time | Usually quite fast, but same‑day is not guaranteed | Several working days; can be longer in peak season |
| Fee level | Lower (shorter stay, fewer formalities) | Higher (more formal visa) |
| Arrival experience | Join e‑VoA/VoA lanes; may still queue | Go directly to immigration with pre‑approved e‑Visa |
We see many Bali visitors who qualify for both choose e‑VoA for short trips (up to around a month) and a visit e‑Visa when they’re planning a longer stay or multiple extensions.
2.1 Check your passport validity
For both visa types, your passport generally must be valid for at least 6 months from date of entry. Some travellers have been allowed with slightly less at the discretion of officers, but you should not rely on that. If you’re close to the 6‑month mark, renew your passport first.
2.2 Check your ticket and return plans
Immigration wants to see that you will leave Indonesia on time. That can be a return ticket to your home country, or an onward ticket to another destination. Open‑ended one‑way travel can trigger questions at check‑in or landing.
Step 3 – Documents you need before you start
3.1 Mandatory documents
Prepare clear digital copies before starting your Indonesia e visa application steps:
- Passport biodata page scan (photo page):
- Color, high resolution.
- No glare, fingers, or heavy shadows.
- All text readable when zoomed.
- Recent passport-style photo:
- Plain light background.
- Face visible, no heavy filters or sunglasses.
- Crop so your head and shoulders fill most of the frame.
- Return or onward ticket (for visit e‑Visa and sometimes checked for e‑VoA):
- PDF or screenshot of booking confirmation with your name and dates.
3.2 Recommended supporting documents
Not always requested on-screen, but very useful if an officer reviews your application:
- Hotel or villa booking for at least the first part of the trip.
- Rough itinerary (especially if visiting multiple islands).
- Evidence of funds if your stay is long – basic bank statement or pay slip.
For some visit e‑Visa sub‑types, a local sponsor letter or company documentation is required. If you fall in that category, it’s safer to speak with a professional first; the exact wording and format matter.
3.3 File format and size tips
The portal can be picky about file formats and sizes:
- Use JPEG or PNG for photos; PDF for tickets and letters.
- Keep individual files under the listed size limit (commonly a few MB).
- Name files clearly (e.g. Surname_Passport.jpg, Surname_Photo.jpg).
Step 4 – How to apply for an e‑VoA on evisa.imigrasi.go.id
4.1 Start a new application
After logging in:
- Click “New Application” or the equivalent button.
- Select the e-VoA option (often marked clearly as electronic Visa on Arrival).
- Choose your purpose of visit (tourism / tourism & social / limited business, etc.).
4.2 Fill in your personal details carefully
You’ll be asked for standard details:
- Full name, gender, date and place of birth.
- Passport number, issue and expiry date, issuing country.
- Home address and contact details.
- Intended arrival date and port of entry (airport/seaport).
Match everything to your passport. Small typos (for example transposed numbers) can cause mismatches at the border.
4.3 Upload your passport and photo
Upload the prepared files when prompted:
- Check that the preview shows your full passport page.
- Ensure your photo is upright and not sideways.
- Avoid over-editing: immigration prefers natural photographs.
4.4 Review, confirm, and submit
Before pressing “Submit”:
- Double-check passport number, nationality, and arrival date.
- Note any reference number shown on screen or sent by email.
After submission, the system should guide you directly to the payment stage if everything passes basic validation.
4.5 Pay the e-VoA fee
Fees are set in Indonesian Rupiah by regulation. Card processors may show or charge in other currencies using their own exchange rate. Based on recent monitoring up to June 2026:
- Expect government e‑VoA fees in the range of USD 35–50 equivalent per person once converted and including typical card and platform charges.
Payment options typically include:
- International credit/debit cards (Visa, Mastercard, and selected others).
- Sometimes additional regional payment options depending on your location.
If payment fails:
- Try another card or browser (Chrome/Edge often work better than older browsers).
- Confirm with your bank that international online payments to Indonesia are allowed.
- Avoid multiple rapid retries – that can trigger fraud filters.
4.6 Wait for approval and download your e-VoA
Processing speed varies. Many travellers receive their e‑VoA approval email relatively quickly, but this is not guaranteed. Once approved:
- Log in and download the PDF e‑VoA.
- Save it on your phone and ideally print a hard copy.
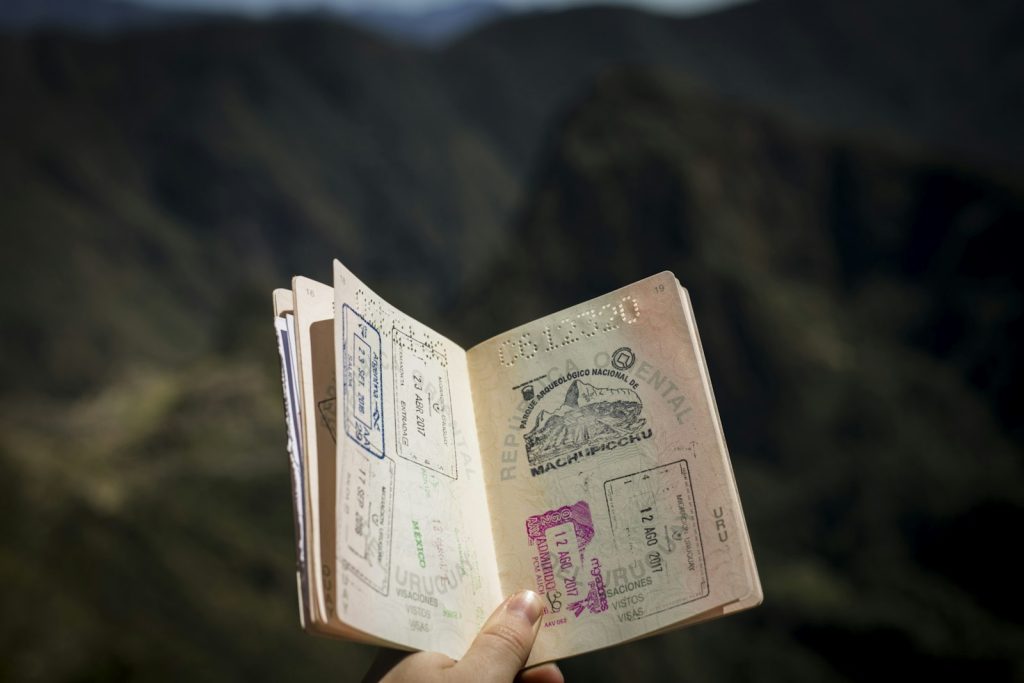
On arrival in Bali (or other Indonesian entry points that honor e‑VoA), show the QR code/barcode and details to immigration officers in the dedicated lanes. You may also be asked to show your return ticket and accommodation details.
Step 5 – How to apply for a single-entry Visit e‑Visa
For those staying longer or wanting everything cleared before flying, here’s how to handle the online visa application Indonesia for a visit e‑Visa.
5.1 Confirm the correct sub-type
Under “Visit Visa,” you may see multiple codes. The ones commonly used by tourists and social visitors are typically marked for tourism or social activities. The exact code set can change with new regulations.
Choosing the wrong sub-type is one of the top reasons self-applied visit visas get stuck or rejected. If in doubt, ask your sponsor or an agent that works with these codes every day.
5.2 Sponsor vs no sponsor
Historically many visit e‑Visas in Indonesia required a local sponsor (individual or company). In recent years some routes for tourism have become more self-service. As of June 2026, the landscape is:
- Some tourist visit e‑Visas can be initiated by the traveller directly.
- Others still require a sponsor account on the immigration system that files on your behalf.
If the portal insists on sponsor inputs you don’t have, you are likely on a sponsored track. That’s where a vetted agency or local partner becomes practical.
5.3 Fill in the application form
You will need to provide:
- Full personal and passport data.
- Planned arrival and departure dates.
- The address of your first accommodation in Indonesia.
- Purpose of visit (tourism, visiting family, etc.).
Carefully match the details to your supporting documents and your sponsor’s letter (if any). Inconsistencies raise red flags.
5.4 Upload additional documentation
Compared with e‑VoA, visit e‑Visas may ask for:
- Proof of accommodation (hotel, villa, long-stay rental).
- Bank statement or other proof of funds.
- Sponsor letter and ID/company documents (if using a sponsor).
This is where many DIY applicants get overwhelmed or stuck because the portal error messages are not always clear. If a field confuses you or the upload fails repeatedly, it can be more efficient to hand the case to a professional early rather than fight the system for days.
5.5 Pay the visit e‑Visa fee
Single-entry visit e‑Visas carry higher government fees than e‑VoA. From recent cases we track up to June 2026, you should expect total upfront costs, including government fees and typical processing charges, to fall roughly in the USD 80–180 equivalent range per person, depending on:
- Visa sub-type and allowed stay.
- Use of a sponsor/agent and their service fee.
- Exchange rates and payment processing charges.
Use the same payment best practices as with e‑VoA: stable connection, supported card, and patience between retries.
5.6 Processing times and status checks
Visit e‑Visa processing is less predictable than e‑VoA:
- Some applications are approved in a few working days.
- Others take a week or more, especially around public holidays or when new rules roll out.
Within your account you should see an application status. If it’s pending for significantly longer than typical, a sponsor or agent can sometimes chase or clarify, but there is no guaranteed fast-track button inside the public portal itself.
5.7 Download and check your e‑Visa
Once approved:
- Download the PDF e‑Visa from your account.
- Verify key details:
- Your name and passport number.
- Validity dates.
- Visa type and number of entries (usually single entry).
- Print a paper copy and save a digital copy on your phone.
On arrival, show this e‑Visa at immigration. Keep your return ticket and accommodation proof ready in case the officer asks for them.
Step 6 – Arrival in Indonesia with an e‑Visa
6.1 At the airport
On landing in Denpasar (Bali), Jakarta, or other permitted entry points:
- Follow signs for Visa on Arrival / e‑VoA / e‑Visa.
- Keep these items handy:
- Passport.
- Printed e‑VoA or visit e‑Visa approval.
- Return or onward ticket.
- Accommodation booking.
Officers may ask basic questions about your stay: how long, where you’re staying, and what you plan to do. Clear, simple answers help.
6.2 e‑VoA vs visit e‑Visa on arrival
- e‑VoA: In many airports you join a lane marked for e‑VoA / VoA. Your payment is already done, but officers still check eligibility and may stamp your passport with length of stay.
- Visit e‑Visa: You usually bypass any VoA payment counters and go straight to immigration, showing your pre-approved e‑Visa printout and passport.
Always check the stay period stamped in your passport. That is what officers refer to if there is any question during your stay or at exit.
Safety, scams, and common pitfalls
7.1 Avoid unofficial “guaranteed approval” promises
No one outside Immigration can guarantee a visa. Agencies can reduce mistakes and manage paperwork, but decisions are ultimately made by government officers. Be cautious of:
- Sites that copy the look of evisa.imigrasi.go.id but are not on the .go.id domain.
- Services that ask for your full email + password to the official portal (they should not need full login access; they can apply through their own sponsor account).
7.2 Overstays and extensions
Overstaying – even by a day – can lead to fines and formal overstay stamps. Rules around extension options for e‑VoA and visit e‑Visas change, and extension processes are not always intuitive for visitors.
If you suspect you will want to stay longer than the initial granted period, plan this at the visa selection stage, not at the last minute. A properly chosen visit e‑Visa plus planned extension route is usually safer than trying to improvise on the ground.
7.3 Technical issues
The e‑Visa system has improved, but you can still see:
- Timeouts or payment failures at busy hours.
- Uploads that show as “failed” without a clear reason.
- Emails that land in spam.
If you’re flying soon and your application is stuck or behaving strangely, that is exactly the kind of scenario where our team can step in, check what’s realistically possible, and suggest a path that doesn’t jeopardize your trip.
DIY vs concierge help – which is right for you?
8.1 Who does well with DIY?
You may be fine doing everything yourself if:
- Your passport is from a commonly eligible e‑VoA country.
- Your trip is short, with clear return tickets and simple tourism plans.
- You are patient with online forms and occasional technical glitches.
8.2 Who benefits from expert help?
Professional assistance is worth considering if you:
- Are traveling as a family or group and want all approvals aligned.
- Plan a longer Bali stay with extensions or multiple islands.
- Have had visa issues, overstays, or refusals in the past.
- Hold a nationality with more complex eligibility rules.
At Bali Visa Application we maintain up‑to‑date, practical knowledge of the e‑Visa system, policy shifts, and real‑world officer behavior across Bali and other gateways. No one can pay to change what we publish; if you proceed with our partner they may pay us a referral fee at no extra cost to you.
If you’d like someone to sanity‑check your plan, structure the right visa choice, and coordinate with vetted local sponsors or agents where needed, you can plan your trip with our team – including back‑and‑forth via WhatsApp to keep everything moving while you’re busy.
Practical tips to make your Indonesia e-Visa process smoother
9.1 Time your application
- For e‑VoA, apply several days before departure, not the night before you fly.
- For visit e‑Visas, allow at least 10–14 days from submission to wheels up, especially in peak travel months.
9.2 Keep consistent information
Use the same spellings and data across:
- Passport.
- Flight bookings.
- Hotel bookings.
- Visa application.
Inconsistencies don’t always cause rejections, but they do make manual checks more likely.
9.3 Print everything important
While officers increasingly accept screens, printed copies of your e‑Visa, tickets, and booking confirmations remove the “my battery died” or “airport Wi‑Fi is down” risk at exactly the wrong time.
9.4 Respect the purpose of stay
If your visa says tourism/social visit, don’t use it for work or income-generating activities inside Indonesia. Immigration takes unauthorized work seriously, and digital traces (social media, websites, etc.) are increasingly easy to verify.
Need help choosing or applying for your e‑Visa?
If this all feels like too many moving parts – eligibility, documents, timing, sponsors, extensions – you’re not alone. The system is more digital than it used to be, but it isn’t always user‑friendly.
Bali Visa Application exists to make this manageable. We combine daily monitoring of Indonesian immigration policy with on‑the‑ground experience of how rules are applied at Bali and other entry points. We can:
- Help choose between e‑VoA and visit e‑Visa for your exact itinerary.
- Pre‑check your documents so you’re not rejected for avoidable mistakes.
- Connect you with vetted visa sponsors/agents if your case needs them.
- Align your visa plan with your Bali accommodation and inter-island travel.
To map this onto your real trip dates, you can plan your trip with us – share your details and we’ll outline options, then keep the conversation going on WhatsApp so you’re not left guessing between each step.
FAQs: Indonesia e‑Visa & e‑VoA
Do I still need to visit an embassy if I get an e‑VoA or visit e‑Visa?
For e‑VoA and most tourist-focused visit e‑Visas covered here, no embassy visit is required. The process is fully online and you receive a PDF approval to present on arrival. Some other visa categories still require consular visits or additional biometrics; those are separate from the e‑VoA and standard visit e‑Visa routes.
Can I extend my e‑VoA or visit e‑Visa in Bali?
Under current regulations, certain e‑VoA and visit e‑Visas can be extended at local immigration offices for an additional fee, usually with the help of an agent to handle appointments and paperwork. The exact extension rules, number of possible extensions, and allowed total stay can change, so check the latest policy – or ask us to confirm what’s realistic for your dates before you lock in flights.
What if my e‑Visa is approved but my passport details change?
If your passport number or other core details change after approval (for example, you renew a nearly expired passport), you generally cannot transfer that e‑Visa to the new passport. You’ll likely need to reapply using the updated details. This is another reason to ensure your passport has enough validity before starting any e‑Visa application.
Can I enter Indonesia at any airport with an e‑VoA or visit e‑Visa?
Not every border crossing processes every visa type. Major international airports and seaports – such as Bali (Denpasar) and Jakarta – usually support both e‑VoA and visit e‑Visas, but some smaller entry points may have more limited capabilities. Always check that your planned port of entry is approved for your particular visa type before you finalize flights.
Is it safer to apply via evisa.imigrasi.go.id myself or use an agent?
Using the official portal directly is the cleanest route if your case is simple and you’re comfortable with online forms. An experienced agent or concierge is useful when you need a sponsor, have prior complications, or don’t have time to manage possible portal issues and follow-ups. Our role at Bali Visa Application is to help you choose the right path and, if you prefer support, connect you with vetted professionals while keeping you informed about the real requirements and costs.